_a0c995be-7809-485f-bb5f-71484e7a1277.svg)
To view the scan that you’ve created, please head to teleport.varjo.com, login, and click on ‘Captures’ in the top-right. Then, click on the icon of the scan you’d like to view.
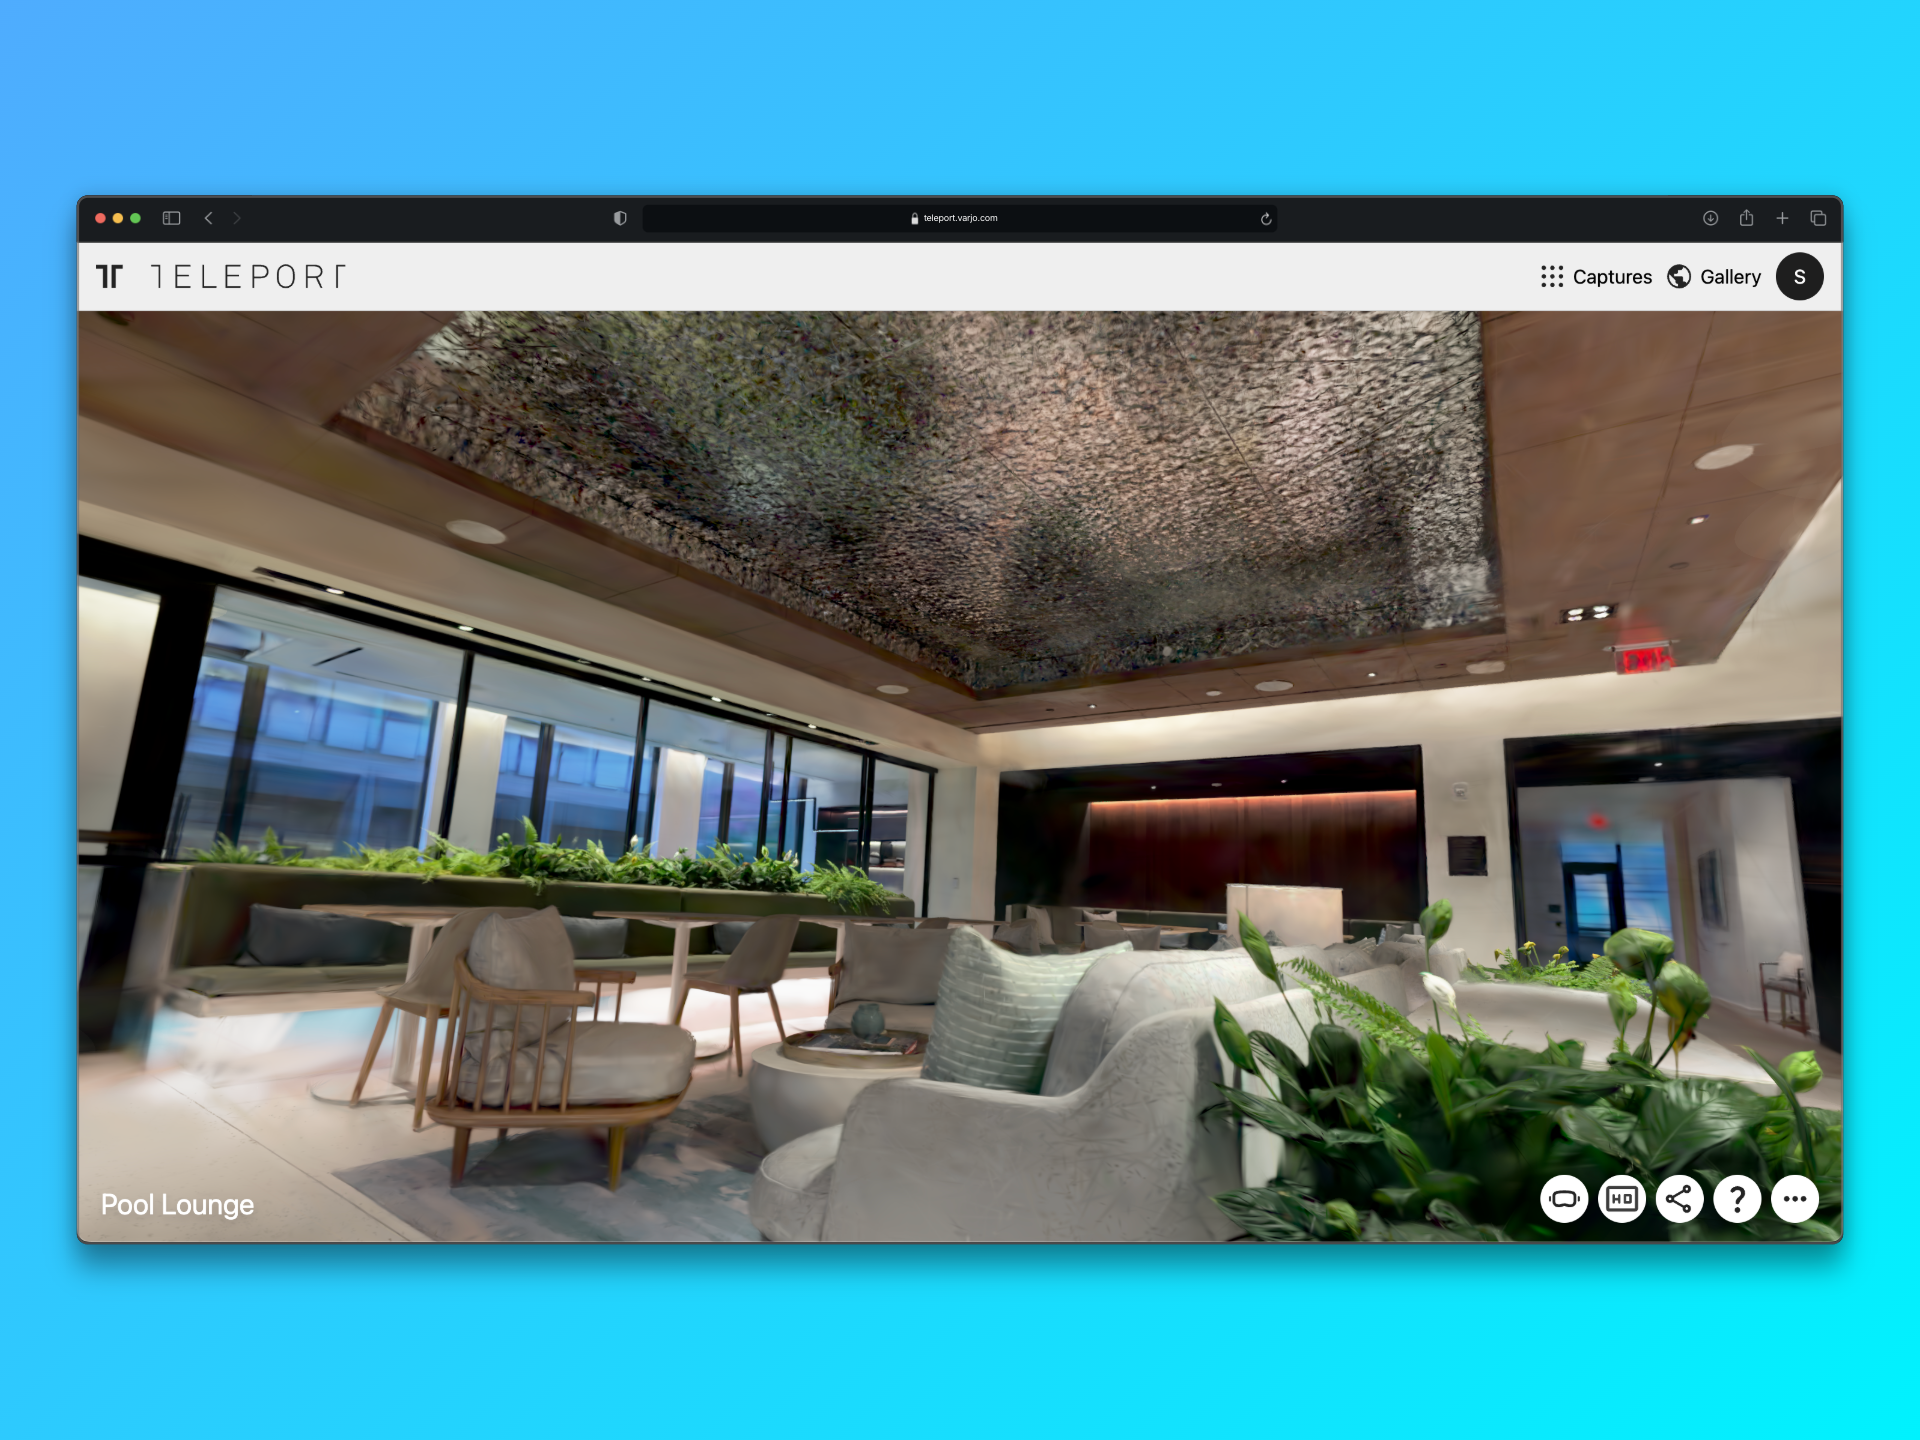
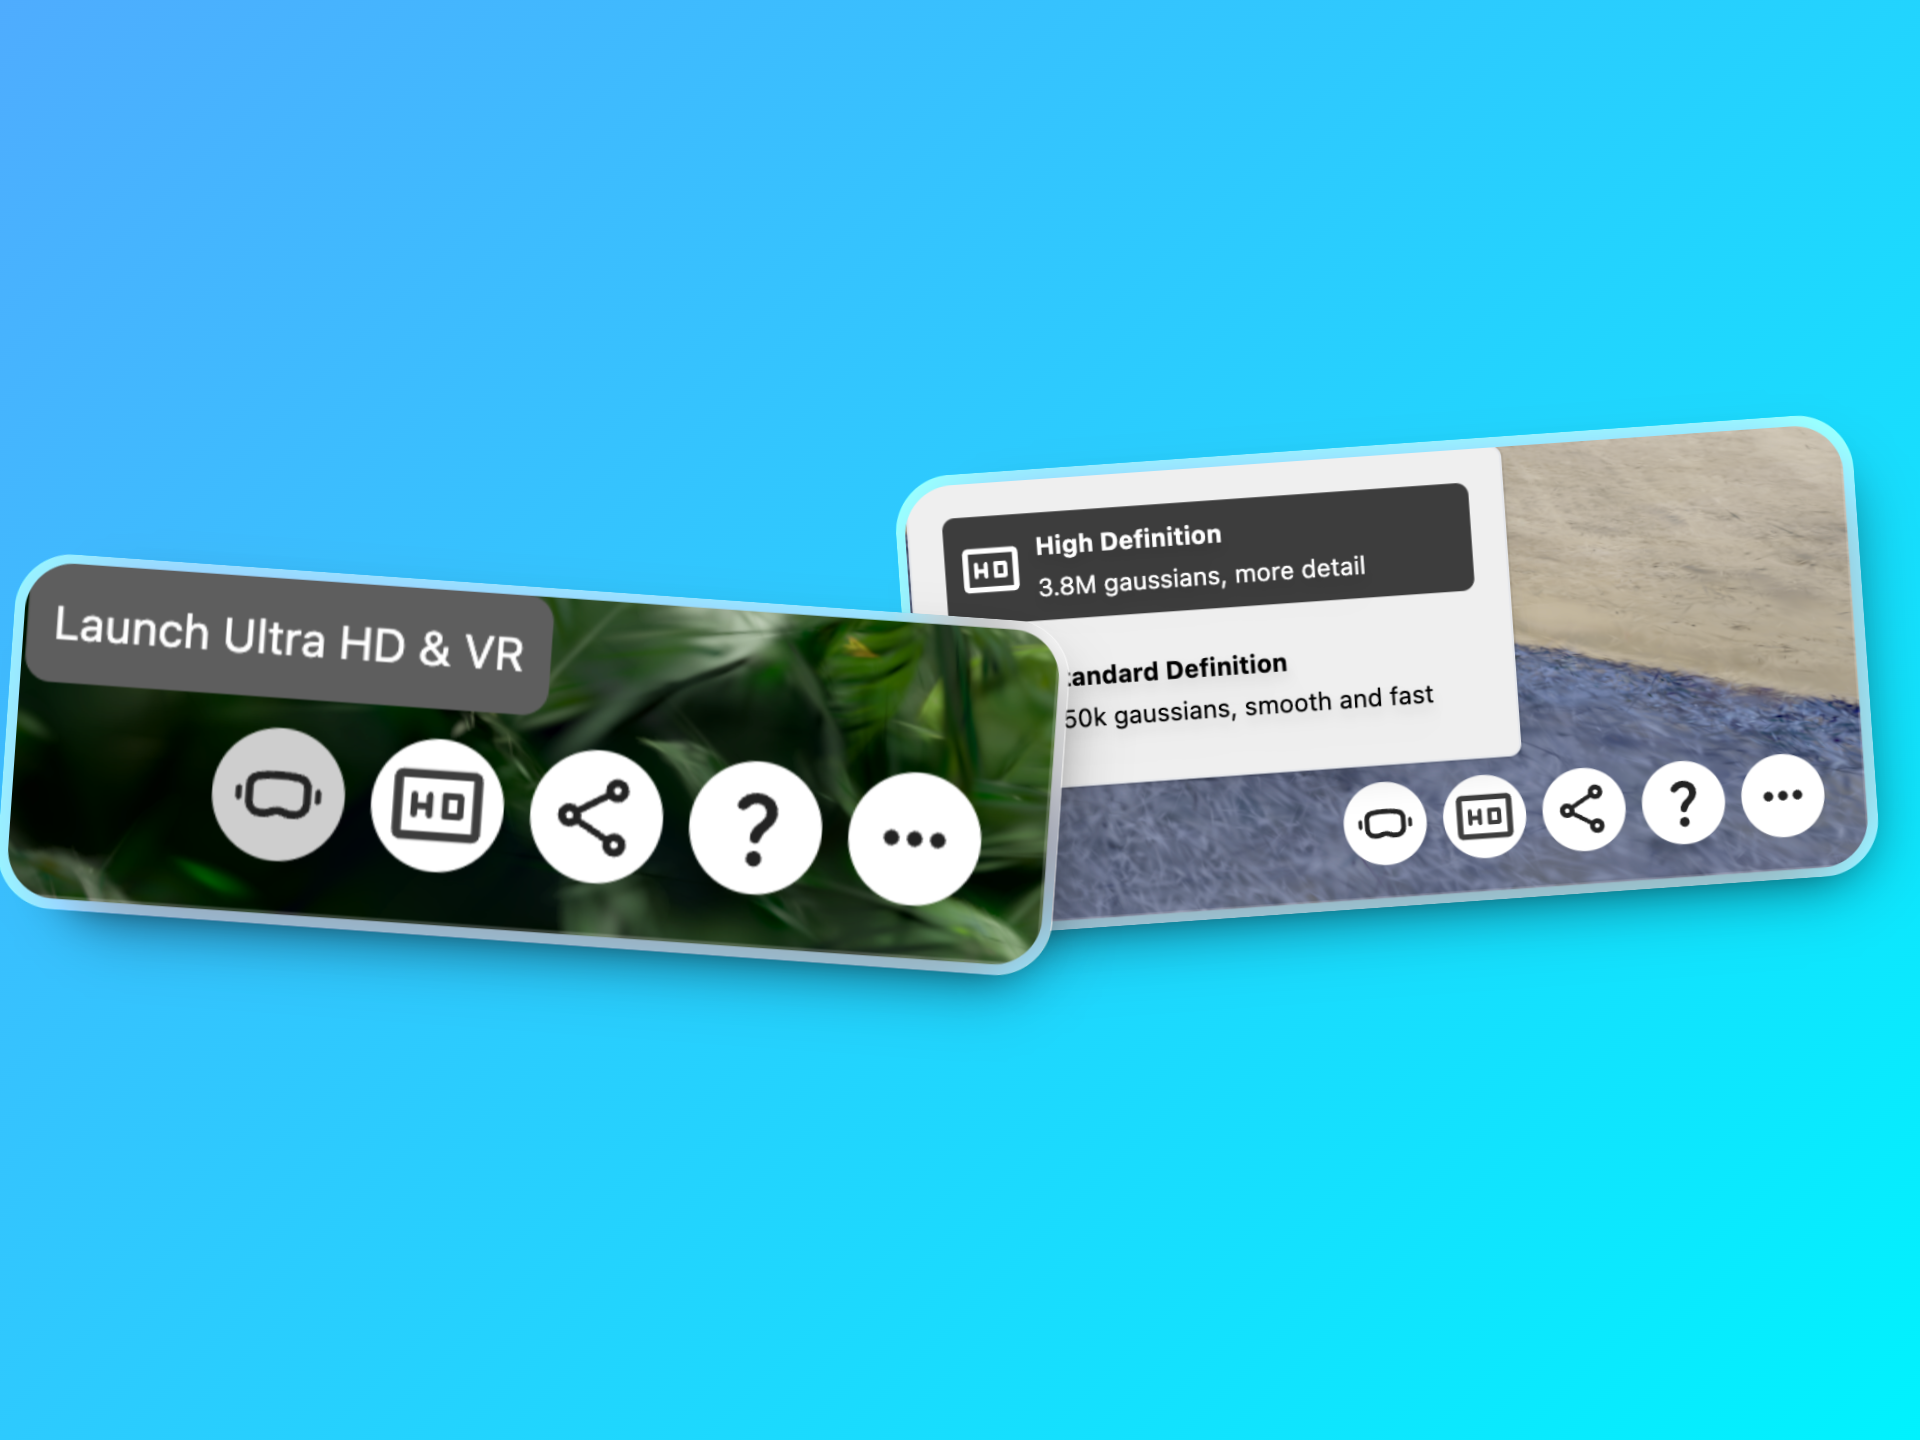
Once on the capture page, the scan will automatically load up. In the bottom right, there are five buttons with distinct functions:
__________________________________
Launch Ultra HD & VR → Grants the ability to load up the scene in maximum fidelity with the Teleport Desktop Application. Powered by Unity, Teleport’s Desktop Application allows for immersive viewing in VR, high-fidelity 2D viewing, measurement of the capture, and annotation.
Select Quality → Allows for a choice between two different quality levels of the Teleport capture. ‘Standard Definition’ will show the scene with a lower splat count, providing a more render efficient experience for lower-end machines or mobile devices while also loading quicker. On the other hand, ‘High Definition’ will offer a greater fidelity version of the scene to take full advantage of Teleport’s photorealistic capture capabilities.
Share Capture → Generates a ‘share link’ for this particular Teleport scene, which will automatically be copied to the clipboard. Please note that anybody with this share link can access and view the capture (even without logging in).
Help → Shows a diagram with all controls for viewing in the web browser on desktop with a mouse and keyboard. The mouse controls translate the same over to a trackpad too.
More → Presents additional information about a particular capture, as well as the option to download an auto-generated video flying through the scene to share with others, and the option to download the raw point cloud data in .ply format. Lastly, a Teleport capture can be deleted here.